Step-by-step Guide
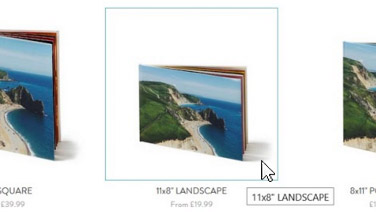
Choose the photo book size and style you'd like to order on the Photo Books page.
- Once you are in the photo book builder,
these cannot be changed.
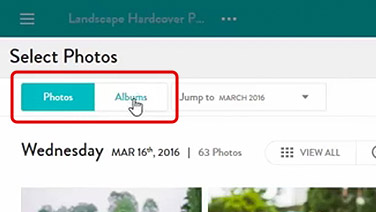
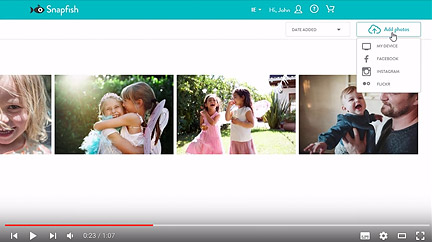
Start by selecting the photos you'd like to use in your photo book. In Photo Library you can pick your photos either by "Photos" or by "Albums".
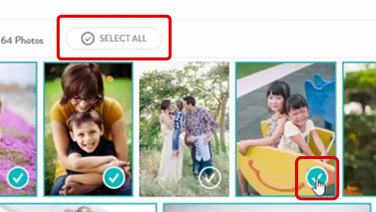
- If you want to select all photos in a given album, just click "Select all" or select individual photos by clicking on the check-box in the bottom right corner of the photo.
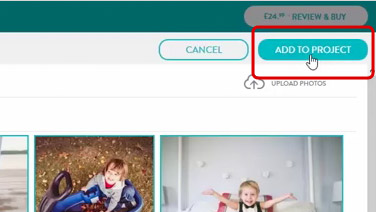
Click "Add To Project" once you are done choosing your photos.
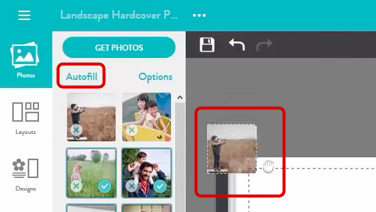
In the photo book builder, you can select the autofill option or place your photos manually.
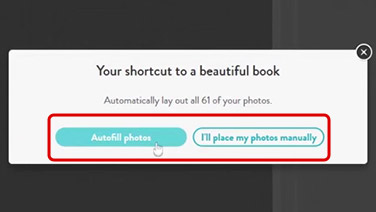
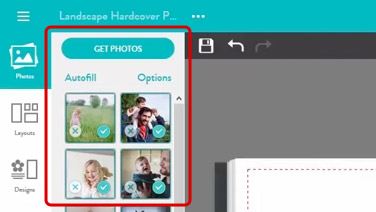
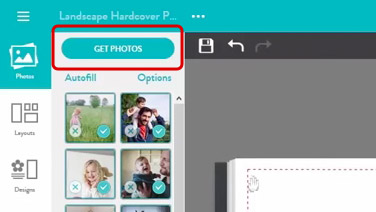
- "Autofill Photos" allows you to create your photo book within seconds. Each page is filled with a random number of photos using different layouts. The photos you have selected are now in the photo well on the left hand side. Photos with blue tick have already been used in the book.
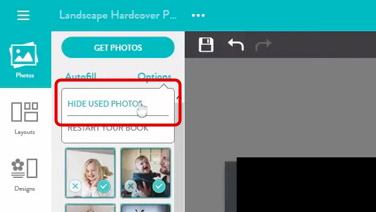
- To hide used photos, go to options and select "Hide Used Photos"
You can add additional photos to the project or delete unwanted ones.
If you want to add photos to your photo book, you can do it manually by dragging an image from the photo well and dropping it on the page. Or you can run "Autofill" again.
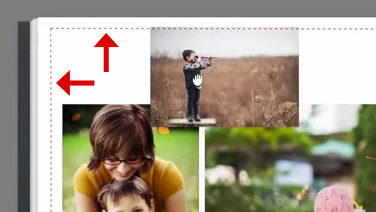
Keep an eye on the printing safe zone. Note the dotter red border around the edge of the page and make sure that no photos, text or embellishments are outside of this line as they will not be printed.
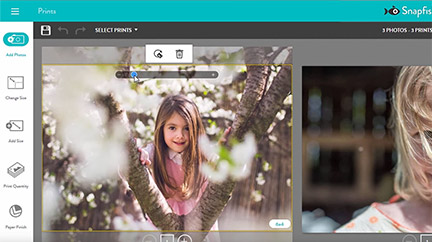
There are many different editing options available when creating a photo book.If you sellect the photo you'd like to edit, you will see the following options:
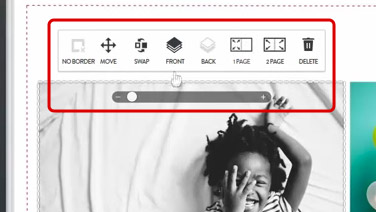
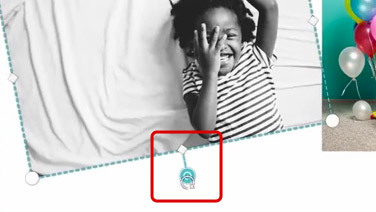
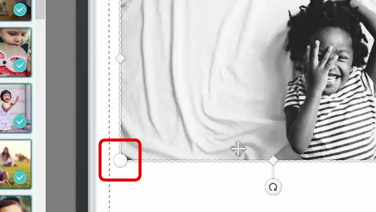
- Rotate using the bottom rotate button (you must click "Move" in the editing toolbar first)
- Resize and crop the photo using any of the edge markers
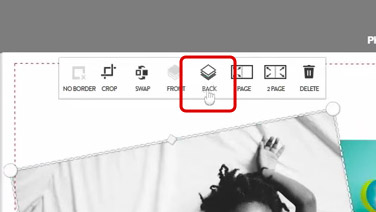
- Change the order of a photo by moving it to the front or back of the page by using the layering icon.
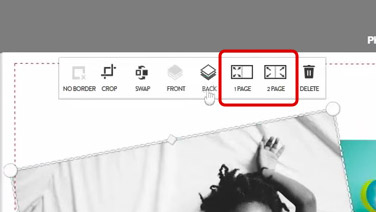
- Make a photo the background of one or two pages by clicking either button.
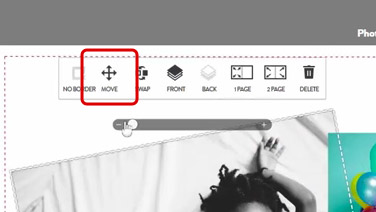
- Move the photo around the page by using move mode.
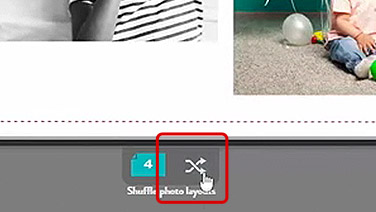
- Shuffle photos to produce completely new layout using the shuffle button. Please note that "Shuffle" does not move non-photo objects like text or embellishments.
- Revert to a previous layout by pressing the "Undo" button

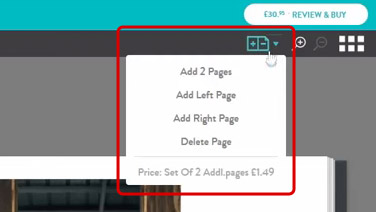
Add additional pages using the "Add / Remove Page" button. A standard Snapfish photo books start from 20 pages and you can add additional pages or delete them in multiples of 2. However, you cannot go under the minimum number of pages.
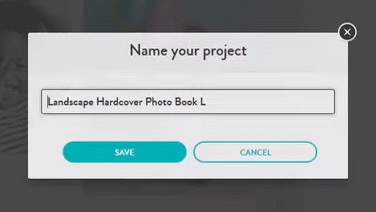
Save your photo book project and keep saving the changes while you are working on your photo book.
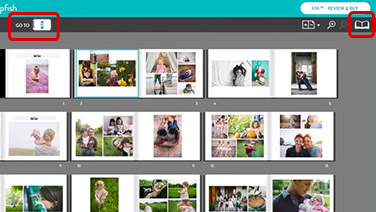
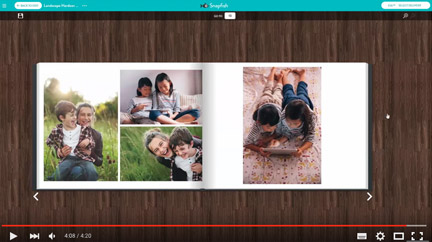
To view your photo book from cover to cover select "Book View". You can double-click on a page or type its number in the top toolbar and press enter if you want to review a particular page.
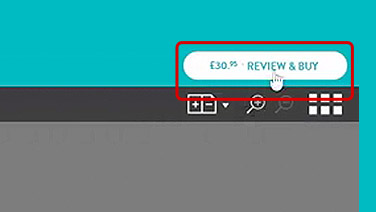
Click "Review & Buy". Always review your photo book from cover to cover including the spine before you order.
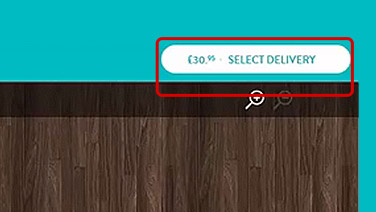
Click "Add to cart" and check out.
- If this is your first purchase, you might be prompted to enter your delivery address before you can see the photo book in your cart.
Other related videos

Advanced: How to Create a photo book
How to upload photos to the new Snapfish
How to edit photos in My Library